The letter processing module allows you to use a 3rd-party letter processing company from within Lariat in order to electronically handle all of your letter processing needs. Depending on the amount of letters you typically mail each month, this could represent a significant savings in your mailing costs.
Setup
The first step is to contact your letter processor, to find out pricing, setup procedures and the types of letters they can generate for you. When you’re ready to move forward a client id, username and password will be assigned to you by the letter processing company. Choose “Globals” from the Admin / System Config category. Select “Letter Processing Module” from the dropdown choice on the upper right portion of the screen.
Letter Processing Settings
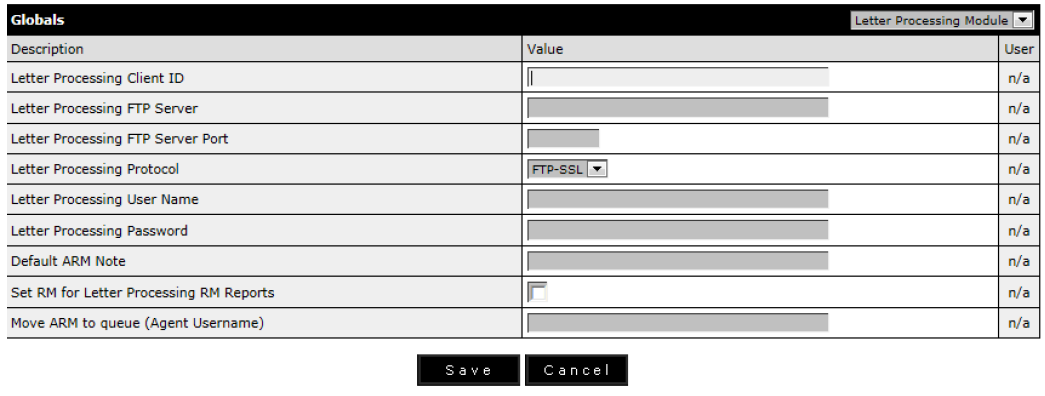
- Client ID – A three digit code assigned by your letter processor
- FTP server – The FTP server address that you will upload the files to
- FTP Server Port – This is the FTP server port number to use
- Letter Processing Protocol – This specifies the FTP protocol to use
- Username – Your letter processor assigned UserID
- Password – Your letter processor assigned Password
- Default ARM Note – A customized note for ARM records
- Set RM for Letter Processing RM Reports – This sets the RM box for a debtor indicating that no more letters should be generated
- Move ARM to Queue – This designates the queue to move the ARM to. You should specify the Lariat agent username
Creating letters
Creating electronic letters is done in the Agency Config / Letters area. Choose the letters menu link and then choose the Letter Processing Module link at the top of the page
Letters screen


Choose the Add link at the top of the screen and you will be presented with the letter template screen displayed below.
Add Letter screen
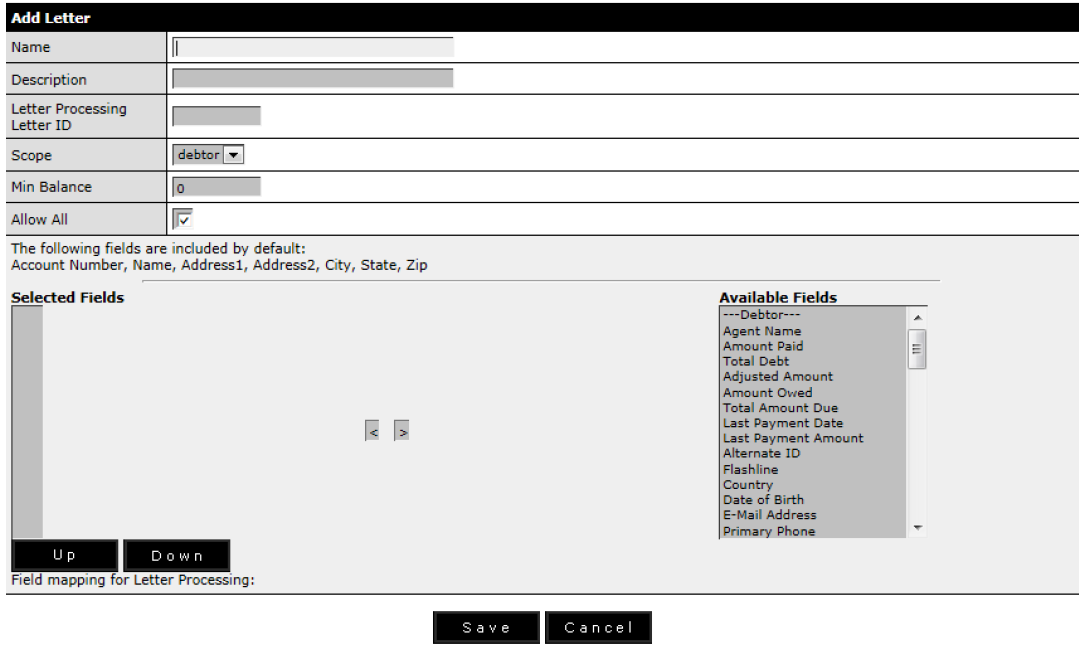
- Name – This is the name of the letter
- Description – Enter a short description of your letter
- Letter Processing Letter ID – This identifies this unique letter with your Letter Processor
- Scope – This defines the letter as a debtor or debt scope letter
- Min Balance – This defines the minimum debt balance needed in order to generate a letter
- Allow all – If checked then everyone has access to this letter.
- Selected Fields – Highlight the fields that you wish included in the letter from the panel on the right (Available Fields) and press the “<” arrow to move them to the Selected Fields box. Use the UP and Down buttons to re-order selected fields.
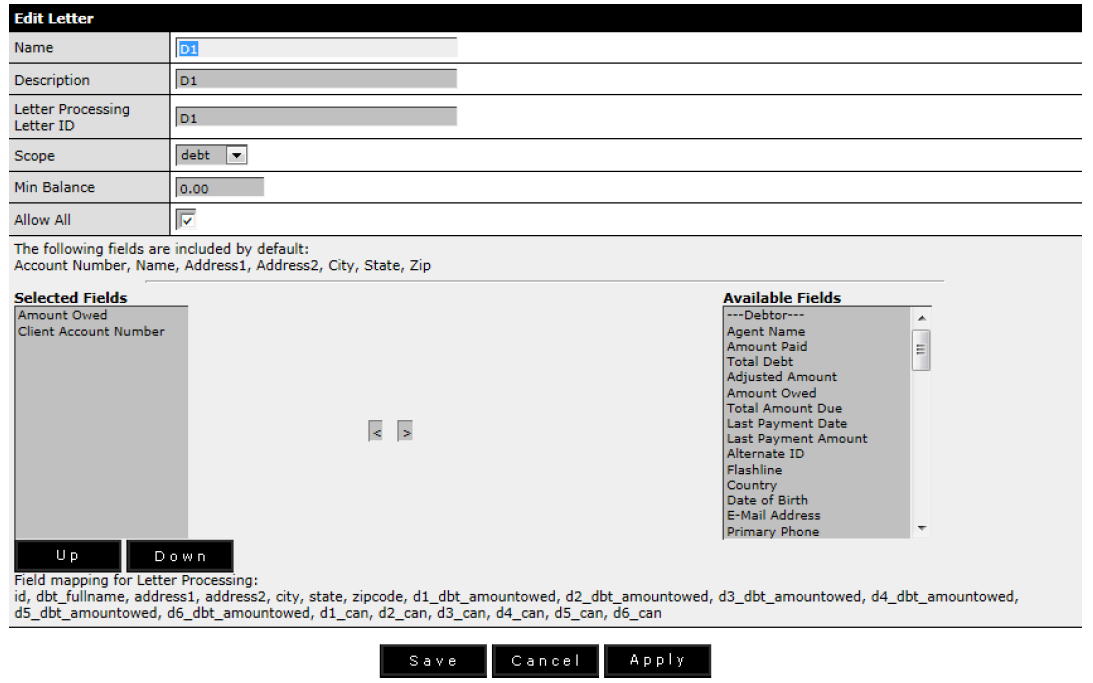
Edit Letter
Select an existing letter from the letter browse screen and you will be presented with the edit screen (example above) with the saved letter information. You can then modify this information and save the new letter.
Edit Letter screen