The Data Connect module contains an import feature which is meant to accommodate our customers working with skip tracing vendors. In addition, this module can be used to update existing Lariat data. By combining the Query Engine to export data; manipulating that data in a spreadsheet and then re-importing the data to perform the data connect functions available.

|
To find: Admin > Import > Data Connect. If you do not see Data Connect in this list, this means the administrative level needs to have the Data Connect permission added. Once you click on it, next you need to upload your prepared csv file. |
Response Codes - This is the category you want to change and it needs to be setup before you can import the data. For example, you want to move debtors to a different agent. The response code would need to be setup and called something like "change agent". 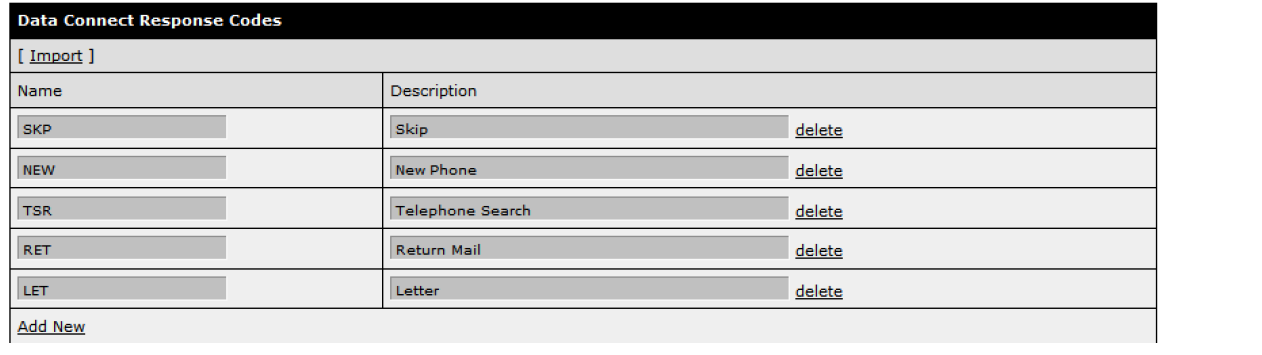
*Note: Speak with the representative from your skip tracing provider to get the valid response codes they will send in the CSV file.
The file type Lariat accepts is CSV (comma separated value). The columns do not have to be in any specific order. The top row of the CSV file contains the column headings, and these are used to map the data to the individual Lariat fields. For each response code Lariat will only allow one Debtor record. Multiple response codes for one debtor requires multiple records in the CSV file.
Field Settings
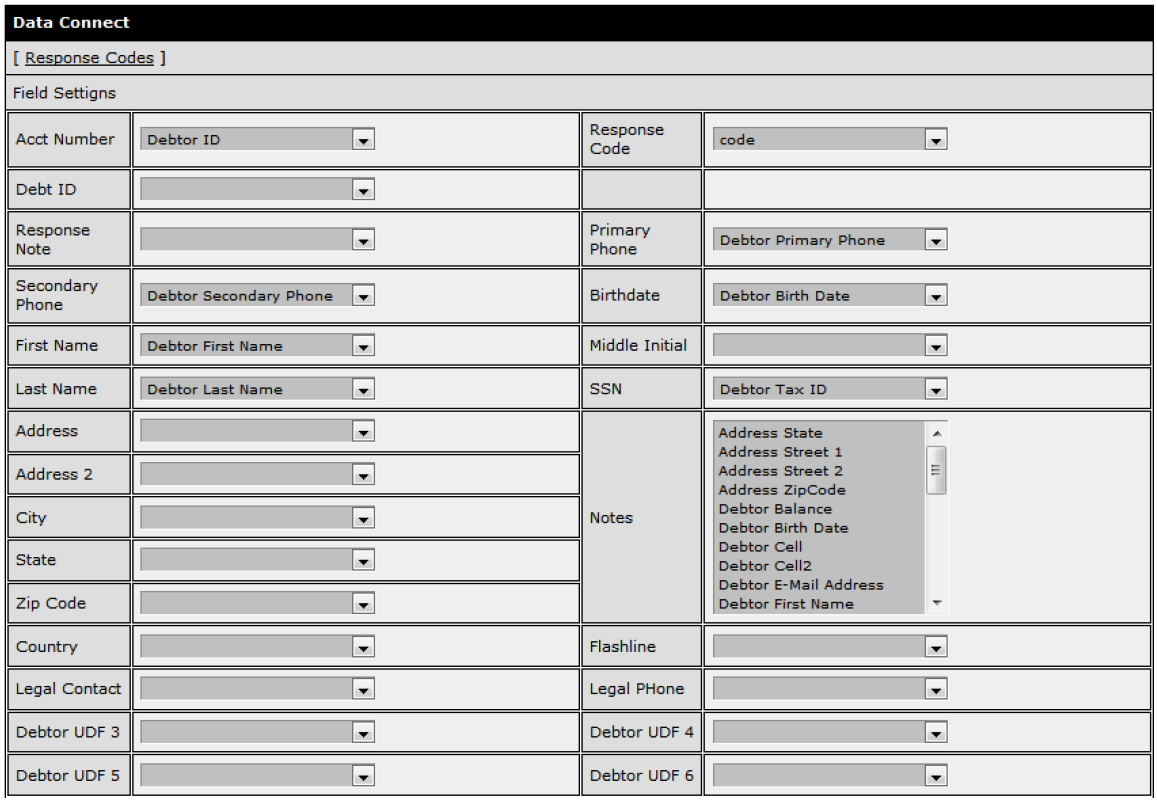
Map the appropriate column from the CSV file to each corresponding field on the screen. There are only 2 required fields, Acct Number and Response Code, the other fields are optional.
- Acct Number – The Lariat debtor account number (Debtor ID).
- Response Code – The response code from the skip trace vendor or one you created.
All fields from the CSV file are listed in the Notes field pick list. Choose which fields should be written to notes.
- Debt ID – If specific debts are included in the import then only those debts will be updated with debt level information such as debt status code.
Send Email check box will send an email to the person performing the import to notify them of job completion. Alternate Emails can be sent to other individuals by typing in their email address separated by a comma.
Email Settings

Rule Settings
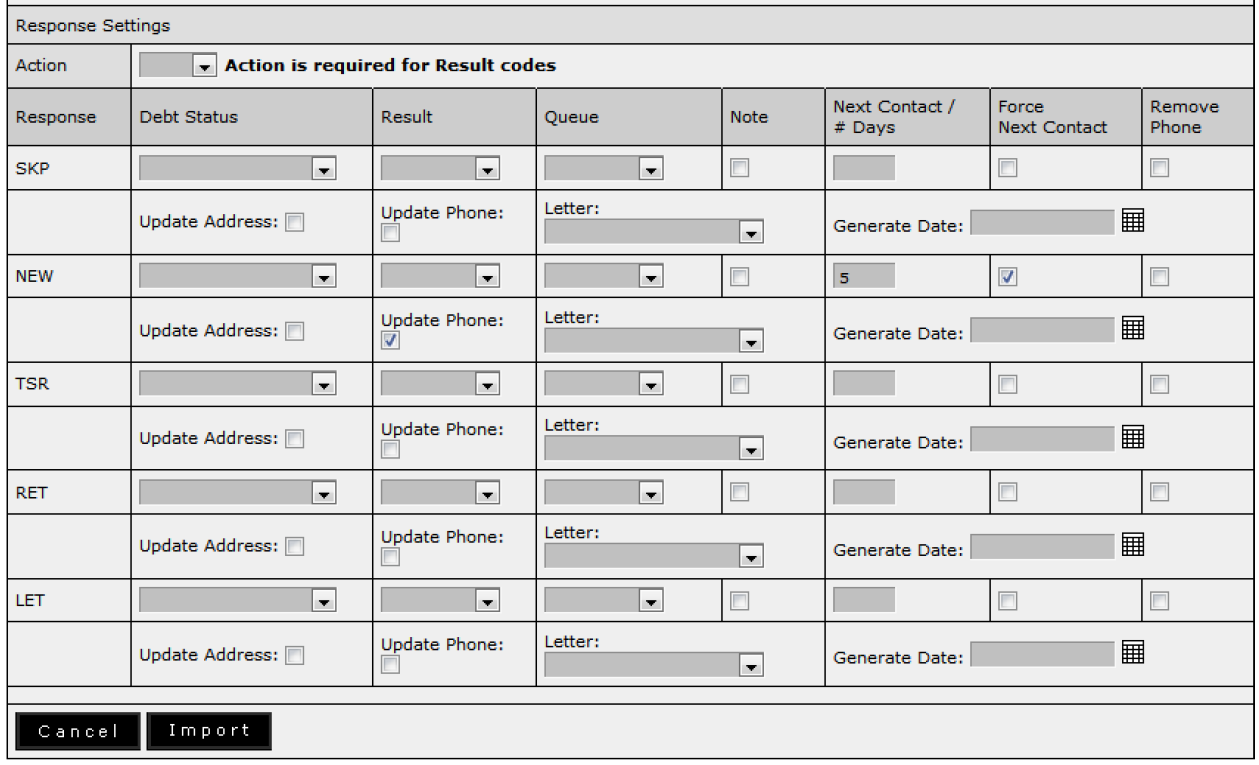
All settings correspond directly to the Response code sent in the file.
Action code – The code in Lariat used on the Call Screen in the Action History panel. In order to update the Result code in the Action History panel this is required. When a record is imported with the chosen Response code an Action Result will be written. If Action is blank nothing will be written in the Action History panel even if a Result code is chosen. Action / Result code can be left blank.
- Debt Status – This is the new debt status code for the debt
- Result – This is the Result code to write for the debtor record
- Queue – This will move the debtor to a new queue. A note of the previous queue is written.
- Note – Write a note
- Next Contact – The number of days to increment the next contact date from the current import date. If the next contact date is greater than or equal to today it will not be updated.
- Force Next Contact Date – This will force the contact date to be updated from todays’ date
- Remove Phone – Remove the phone number, a note with the old phone number is created
- Update Address – Updates the address with the field setting field
- Update Phone – Updates the phones with the field setting field
- Letter – Generate a letter, generate date is required
- Generate Date – Date the letter will be generated by the nightly job or manually
Choose the Import button to start importing the information. It’s not necessary to stay on the screen during the import however you will need to remain logged into Lariat. You can continue to work in other areas of Lariat and then come back later and check the Job Status which displays the percentage complete for the current import.